Pay Pal Plus OTO :: CF Pro Tools Add-On Features For ClickFunnels Pages
Description and Best Use Case For This Add-On:
With the addition of CF Pro Tool's PayPal Plus add-on comes a way to ALSO do PayPal options on the OTO page, and that's PayPal Plus OTO!
You would only use this add-on when also utilizing Paypal Plus on your original order page, but this new OTO variation can be used on any and all OTO Downsell and Upsell pages in your post sale sequence.
This will allow you the option of having two merchants linked to one order page, such as STRIPE and PAYPAL.
If the buyer makes their purchase on the order page using PayPal, they will ONLY have the option to pay with PayPal on the OTO.
Likewise, if they purchase using a CC through STRIPE on the original ORDER PAGE, they will only have the option for a traditional one click upsell (or downsell) on the OTO page.
A great and handy tool to have in your back pocket is your market is prone to purchasing with PayPal and you want to increase your average cart value!
OVERVIEW (For Advanced Users)
For those of you ready to jump in and are familiar with CFProTools, you can use this checklist:Add Your Domain To CFProTools DOMAINS TAB
Create An OTO Upsell or OTO Downsell Type Page
Create Stripe and PayPal versions of your products in PRODUCTS TAB
Create and Configure PAYPAL PLUS OTO Add-On
Toggle As Subscription IF Your OTO Product is a Subscription
Install Script to Footer Tracking Code Settings
Please Refer To Conflicts and Troubleshooting Section For More Info
Only works when testing using LIVE LINK.
Payment Plans and Deferred Payments Do Not Work with PayPal via CF
Step 1: Add Your Domain To CF Pro Tools DOMAINS TAB
Your first step will be to add your domain to the CFPT Domains Tab.
Here's a guide on how to do that:
https://cfprotools.freshdesk.com/support/solutions/articles/29000041078-how-to-add-a-domain-to-cf-pro-tools-online-installation-guides
Step 2: Create Your OTO Page
You will need an OTO TYPE page installed in your funnel on ClickFunnels in order for this add-on to work.
This add-on will work with a one or two step order style setup.
Here's a quick tutorial on how to create funnel pages using ClickFunnels:
https://help.clickfunnels.com/hc/en-us/articles/360060380833-Creating-A-New-Funnel-Step
Step 3: Create Your Product Pairs in the PRODUCTS TAB
Please follow these video directions for setting up your PRODUCTS:
Please Note:  The following video is the same as the Order Page Product Creation video for PayPal Plus.  The procedures are the same for pairing up your Stripe and PayPal Products as before.

The only difference would be that you cannot create BUMP products on an OTO page.

Also note that if you are offering subscriptions, they should be the FIRST product created on the page.
Please Note: For issues with setup of products or PayPal v2, please check with ClickFunnels Support as this falls within their scope of support.
IMPORTANT NOTE: Stripe Products should be setup using the STRIPE Integration in ClickFunnels.
PayPal Products should be setup using the PayPal v2 Integration in ClickFunnels.
CF Help Docs On Setting Up PayPal v2:
https://help.clickfunnels.com/hc/en-us/articles/360006272934-PayPal-API-Integration -- How to Setup PayPal v2
https://help.clickfunnels.com/hc/en-us/articles/360006272914-Setting-Up-A-PayPal-One-Time-Product -- Setup Your PayPal Product
Step 4: Create Your Add-on Script
For most add-on installations of the PAYPAL PLUS OTO script, you can simply click the CREATE NEW button:

Please note:  You CANNOT use this script over and over for other oto pages without having to create a new and unique script.

For each order step where you wish to use PayPal Plus, please generate a new and unique PayPal Plus script from CF Pro Tools.
... now do a keyword search for PayPal Plus OTO

Once you have located the PAYPAL PLUS OTO script, click the thumbnail image and create the add-on per the installation instructions.
You will need to name your script.   We recommend a naming convention like this:

PAYPAL PLUS OTO (TEST FUNNEL)

It's best to name it with the name of the add-on AND in parentheses, make sure to name which funnel it belongs to so you can easily identify later.
One of the first settings you'll set is whether or not you want your add-on to work in SANDBOX (testing environment), or PRODUCTION (that's live) mode.

Please note, the selection you choose above should be the SAME as what you have setup in ClickFunnels.

So if you have your PayPal v2 credentials setup in CF as LIVE, then this selection here should be in PRODUCTION.

It should also be the same as what you have setup in PayPal Plus on your Order Page.
The selections you choose here are at your discretion of how you want your PayPal buttons to look.

Adding in the PRODUCT ID's is not optional.
Each product you have in your products tab should have a pair.
So if you have 2 products created with Stripe, you should have 2 products created with PayPal, and their product ID's should be paired up as a PRODUCT GROUP.
When prompted whether the product on your OTO page is a subscription product or not, please mark accordingly as YES or NO.

Please generate new and unique PayPal Plus Scripts for each Order Page you create where you wish to utilize PayPal Plus.
Once you have completed this area, click the red button below to create your add-on script.

Step 5: Install Your Add-on Script
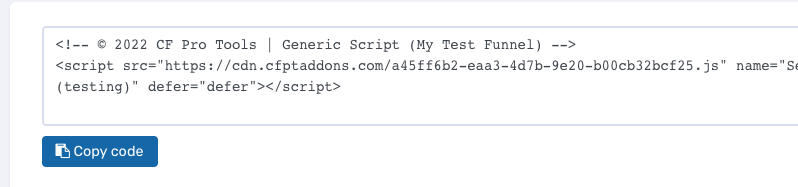
You can now copy your newly generated script out by clicking the blue button where your script is located.
The button says, "COPY CODE", this will copy the script to your virtual clipboard.

You are now ready to paste the script into your FOOTER TRACKING CODE AREA.
Please navigate to your funnel step where you wish to use PAYPAL PLUS OTO.
Click SETTINGS --> TRACKING CODE

Now click the FOOTER CODE TAB, and paste your code in:

Now SAVE your page, you are ready to preview and test your new add-on!
Known Conflicts and Troubleshooting Guide:
PayPal Plus can be a finicky add-on to work with sometimes, but as long as you use it with the correct add-ons, you will not run into any issues.
Here is a list of known conflicting add-ons you will not want to use this add-on with:
If using with VIMEO or YOUTUBE add-on, make sure the PayPal script loads first.
Does not work with ADD / REMOVE PRODUCTS OTO
If you are having trouble getting PayPal to work (most common issue is that the PayPal box pops up and goes away) after setting everything up per the previous instruction vids, please watch this video for 18 of the most common missteps taken during the setup process.
You can find the Checklist in the help doc here:
https://cfprotools.freshdesk.com/a/solutions/articles/29000038980
Important Notes:
--> If you are using this add-on in conjunction with the Vimeo Unpause Unmute add-on, you will want to ensure PayPal OTO Add-On Script code comes first, THEN the Vimeo code.
--> If you have more than 1 OTO Page, you will need to re-create this add-on for EACH OTO page with the specific product ID's you are offering on that page.
--> PayPal OTO REQUIRES PayPal Plus to be used on the ORDER FORM Page. Please do not use this as a stand alone add-on on your OTO Page or it will not function correctly.
What To Do Next:
Here Are A Few Other Help Docs You May Wish To Check Out:
Chances are you already have a CF Pro Tools account and you can find all available resources, there: app.cfprotools.com
However, if you have do not yet have a CF Pro Tools account, you will need one in order to take the actions in this help doc. You can sign up at any time here: www.cfprotools.com
If you have questions, you can also hit us up in support at support@cfprotools.com
Step 5: Install Your Add-on Script
You can now copy your newly generated script out by clicking the blue button where your script is located.
The button says, "COPY CODE", this will copy the script to your virtual clipboard.
You are now ready to paste the script into your FOOTER TRACKING CODE AREA.
Please navigate to your funnel step where you wish to use PAYPAL PLUS OTO.
Click SETTINGS --> TRACKING CODE
Now click the FOOTER CODE TAB, and paste your code in:
Now SAVE your page, you are ready to preview and test your new add-on!
Known Conflicts and Troubleshooting Guide:
PayPal Plus can be a finicky add-on to work with sometimes, but as long as you use it with the correct add-ons, you will not run into any issues.
Here is a list of known conflicting add-ons you will not want to use this add-on with:
The button says, "COPY CODE", this will copy the script to your virtual clipboard.


Here is a list of known conflicting add-ons you will not want to use this add-on with:
If using with VIMEO or YOUTUBE add-on, make sure the PayPal script loads first.
Does not work with ADD / REMOVE PRODUCTS OTO
If using with VIMEO or YOUTUBE add-on, make sure the PayPal script loads first.
Does not work with ADD / REMOVE PRODUCTS OTO
If you are having trouble getting PayPal to work (most common issue is that the PayPal box pops up and goes away) after setting everything up per the previous instruction vids, please watch this video for 18 of the most common missteps taken during the setup process.
You can find the Checklist in the help doc here:
https://cfprotools.freshdesk.com/a/solutions/articles/29000038980
You can find the Checklist in the help doc here:
https://cfprotools.freshdesk.com/a/solutions/articles/29000038980