OTO Add Remove Products :: CF Pro Tools Add-On Features for ClickFunnels
Description and Best Use Case For This Add-On:
Add Remove Products OTO will allow you a more dynamic way of adding multiple bumps to your UPSELL pages.
This add-on was first custom designed for ClickFunnels with the release of Russell Brunson's Traffic Secrets Book, and changed the way ecomm and service based funnels were built.
You can click a button and dynamically add and remove your bump products.
Very cool for adding complimentary products and customizing how they look and feel.
So many options with this add-on, it's all up to your imagination!

The only part of this add-on with functionality is the ADD and REMOVE buttons, the rest of the look is a layout you can use at your imagination's discretion.
OVERVIEW (For Advanced Users)
For those of you ready to jump in and are familiar with CFProTools, you can use this checklist:Add Your Domain To CFProTools DOMAINS TAB
Create An UPSELL or DOWNSELL Page
Create Your Order Bump Products
Create and Install OTO Add/Remove Products Add-on Script
Create Your On-Page Buttons for ADD and ADDED
Set CSS TITLES: cf-add-product-xxxxxx and cf-remove-product-xxxxxxx
Does not work with PayPal Plus, PayPal Plus OTO
Step 1: Add Your Domain To CFProTools DOMAINS TAB
Your first step will be to add your domain to the CFPT Domains Tab.
Here's a guide on how to do that:
https://cfprotools.freshdesk.com/support/solutions/articles/29000041078-how-to-add-a-domain-to-cf-pro-tools-online-installation-guides
Step 2: Create Your OTO UPSELL or DOWNSELL Page
You will need an OTO UPSELL or DOWNSELL page installed in your funnel on ClickFunnels in order for this add-on to work.
You will need to create your "bump" products in the PRODUCTS tab, but it does not matter if they are toggled as BUMP products.
Here's a quick tutorial on how to create funnel pages using ClickFunnels:
https://help.clickfunnels.com/hc/en-us/articles/360060380833-Creating-A-New-Funnel-Step
Step 3: Create Your Add-on Script
For most add-on installations of the ADD / REMOVE PRODUCTS OTO script, you can simply click the CREATE NEW button:

Please note: You can use this script over and over for other order pages without having to create a new and unique script. On-Page Configuration May Be Different.... now do a keyword search for ADD / REMOVE PRODUCTS OTO

Once you have located the ADD / REMOVE PRODUCTS OTO script, click the thumbnail image and create the add-on per the installation instructions.
You will need to name your script.   We recommend a naming convention like this:

ADD/REMOVE OTO(Test Funnel) or
ADD REMOVE PRODUCTS OTO (Book Funnel)

It's best to name it with the name of the add-on AND in parentheses, make sure to name which funnel it belongs to so you can easily identify later.
The only configurable options for the Add/Remove Products OTO add-on is what the buttons will say when hovered over. The add-on has hard coded buttons for ADDED and REMOVE.
With this configurable option, you can update those buttons to say what you would like them to say. This is handy if your page is in another language other than English.

Once you have completed this area, click the red button below to create your add-on script.

Step 4: On-Page Configuration
For your on-page configuration for this add-on, you'll need your product ID's for your BUMP products and we'll be adding 2 buttons to a custom designed bump area.
This is what the custom designed area looks like for Traffic Secrets, but you can honestly use your imagination and create whatever you'd like and add your branding to it:

The layout above is two individual rows, each are 3-column rows.
Columns 1 and 2 are completely customizable, and column 3 contains 2 buttons.
You will need to create an ADD button and an ADDED button and shade them how you wish.
You can even a customized icon to the ADD and ADDED buttons, or you can customize the actual name, although ADD and ADDED do exactly what they say they will do and do not take up too much space.
In your editor it, would look similar to this if you were to customize your buttons:

Note: Neither button needs an action associated to it.
You will need to set a CSS TITLE to each button. Click the "#" in the button settings to update the CSS TITLE:

The ADD or ADD TO CART button should have a CSS TITLE of: cf-add-product-xxxxxx
The ADDED button should have a CSS TITLE of: cf-remove-product-xxxxxx
Please Note: the xxxxxx's are the product ID of your bump product.
Once this process is finished, you should be able to preview the page and click ADD and it will add the product to the cart.
If you hover over the ADDED button, it will show you a hard coded red button that says REMOVE.

This button is hard coded and cannot be changed or updated. If you click the button, the product will be removed from the cart.
REALLY IMPORTANT NOTE: You cannot create an OTO page made up entirely of all ADD/REMOVE products. One of your products MUST be forced into the cart so when the customer clicks your submit button, a product of some sort will be forced into the cart.
ANOTHER REALLY IMPORTANT NOTE: Make sure to select the product you want to force via the BUTTON ACTION SETTINGS and select the product you want to force into the cart from the dropdown menu. If you do not choose a product here, it will always force the first product in the list to the cart.

Step 5: Install Your Add-on Script
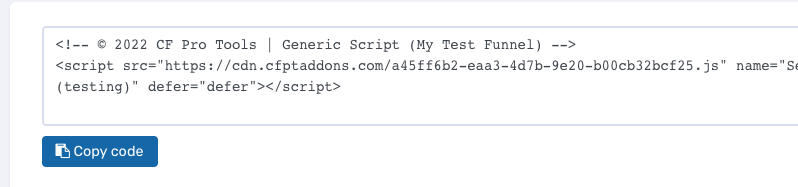
You can now copy your newly generated script out by clicking the blue button where your script is located.
The button says, "COPY CODE", this will copy the script to your virtual clipboard.

You are now ready to paste the script into your FOOTER TRACKING CODE AREA.
Click SETTINGS --> TRACKING CODE

Now click the FOOTER CODE TAB, and paste your code in:

Now SAVE your page, you are ready to preview and test your new add-on!
Known Conflicts:
The following add-ons do not work with ADD / REMOVE PRODUCTS OTO
Does not work with PayPal Plus
Does not work if all products are ADD/REMOVE based. One product will always be forced upon submission.
This may not be an all-inclusive list, if you find any conflicting add-ons with this add-on, please let us know at support@cfprotools.com
What To Do Next:
Here Are A Few Other Help Docs You May Wish To Check Out:
How To Add You Domain To CFProTools
Setup Add/Remove Products on your OTO Page
Other Add-ons To Make Your Page Like Traffic Secrets
Chances are you already have a CF Pro Tools account and you can find all available resoureces, there: app.cfprotools.com
However, if you have do not yet have a CF Pro Tools account, you will need one in order to take the actions in this help doc. You can sign up at any time here: www.cfprotools.com
If you have questions, you can also hit us up in support at support@cfprotools.com
With this configurable option, you can update those buttons to say what you would like them to say. This is handy if your page is in another language other than English.
Step 5: Install Your Add-on Script
You can now copy your newly generated script out by clicking the blue button where your script is located.
The button says, "COPY CODE", this will copy the script to your virtual clipboard.
You are now ready to paste the script into your FOOTER TRACKING CODE AREA.
Click SETTINGS --> TRACKING CODE

Now click the FOOTER CODE TAB, and paste your code in:

Now SAVE your page, you are ready to preview and test your new add-on!
Known Conflicts:
The following add-ons do not work with ADD / REMOVE PRODUCTS OTO
Does not work with PayPal Plus
Does not work if all products are ADD/REMOVE based. One product will always be forced upon submission.
This may not be an all-inclusive list, if you find any conflicting add-ons with this add-on, please let us know at support@cfprotools.com
What To Do Next:
Here Are A Few Other Help Docs You May Wish To Check Out:
How To Add You Domain To CFProTools
Setup Add/Remove Products on your OTO Page
Other Add-ons To Make Your Page Like Traffic Secrets