FB Fire Event :: CF Pro Tools Add-On Features For ClickFunnels
Description and Best Use Case For This Add-On:
This add-on will help you track custom or stock event pixels on Facebook when someone clicks a button in ClickFunnels on any type funnel page.
Can be used to track purchase events WITH an associated value if used on an order page submit button.
Can be very useful if you track actions and events on your pages and want to use them to retarget your audience for additional sales with ads on Facebook.
OVERVIEW (For Advanced Users)
For those of you ready to jump in and are familiar with CFProTools, you can use this checklist:Add Your Domain To CFProTools DOMAINS TAB
Create Any Type Page
Create Button Using Page Editor
Give Button CSS TITLE: cf-fb-Lead or cf-fb-Purchase-12-USD
Add Base Facebook Pixel To Header Tracking Area
Create and Install Add-On Script
No Known Conflicts
Step 1: Add Your Domain To CFProTools DOMAINS TAB
Your first step will be to add your domain to the CFPT Domains Tab.
Here's a guide on how to do that:
Adding your domain to your CF Pro Tools account
Step 2: Create Your ORDER Page Type
You will need to set this add-on up on an ORDER type page on ClickFunnels.
You will also need a 2-Step Order ELEMENT added to the page.
Here's a quick tutorial on how to create funnel pages using ClickFunnels:
https://help.clickfunnels.com/hc/en-us/articles/360060380833-Creating-A-New-Funnel-Step
Step 3: Add Base Tracking Pixel To Header Area
You will need to add your base tracking pixel from Facebook to the HEADER TRACKING area.
You can do this for all your funnel pages by going into your Funnel Settings and adding the pixel to your Global HEADER Settings.
Or you can add the base pixel to JUST your order page by clicking SETTINGS --> TRACKING CODE --> and selecting HEADER CODE

Here's a short video on how to find your base pixel code from Facebook Ads Manager:
Step 4: Create Your Add-on Script
For most add-on installations of the FB Fire Event script, you can simply click the CREATE NEW button:

Please note: You can use this script over and over for other order pages without having to create a new and unique script.
... now do a keyword search for FB Fire Event

Once you have located the FB Fire Event script, click the thumbnail image and create the add-on per the installation instructions.
You will need to name your script.   We recommend a naming convention like this:

FB FE (Test Funnel) or
FB Fire Event (Book Funnel)

It's best to name it with the name of the add-on AND in parentheses, make sure to name which funnel it belongs to so you can easily identify later.
Once you have completed this area, click the red button below to create your add-on script.
Step 5: On-Page Configuration
For your on-page configuration in the page editor, you'll need to add a button to your page.
The FB Fire Event add-on will fire an event pixel upon button push.
So maybe it's for an opt-in, maybe it's just to move to the next page, or possibly even purchasing a product you have setup on an order page.
Once you have a button element added to your page an action set (#next-page, #submit-page, #open-popup, etc), you will need to edit the CSS TITLE of your button by going into the element settings and pressing the "#" icon button at the bottom of the settings window.

Now you can update the CSS TITLE to read: cf-fb-Lead or cf-fb-Purchase-12-USD
You can create a custom event name by just titling one as you wish, or using an existing stock event title.
Click Here for a help doc from Facebook for their standard event ID's:
https://www.facebook.com/business/help/402791146561655?id=1205376682832142
For a Purchase pixel, you can also add a purchase value by adding this parameter to the CSS TITLE of cf-fb- :: "-[value]-[currency id]"
For example if you put your fire event pixel and CSS TITLE on an order button for a $37 product in European currency, your css title might look like this:
cf-fb-Purchase-37-EUR
This information will be pinged back to Facebook for tracking purposes.
Step 6: Install Your Add-on Script
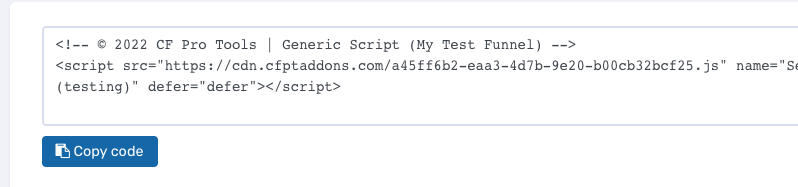
You can now copy your newly generated script out by clicking the blue button where your script is located.
The button says, "COPY CODE", this will copy the script to your virtual clipboard.

You are now ready to paste the script into your FOOTER TRACKING CODE AREA.
Please navigate to your funnel step where you wish to highlight one of your products.
Click SETTINGS --> TRACKING CODE

Now click the FOOTER CODE, and paste your code in:

Now SAVE your page, you are ready to preview and test your new add-on!
Known Conflicts:
No known conflicts at this time.
What To Do Next:
Here Are A Few Other Help Docs You May Wish To Check Out:
Step 6: Install Your Add-on Script
You can now copy your newly generated script out by clicking the blue button where your script is located.
The button says, "COPY CODE", this will copy the script to your virtual clipboard.
You are now ready to paste the script into your FOOTER TRACKING CODE AREA.
Please navigate to your funnel step where you wish to highlight one of your products.
Click SETTINGS --> TRACKING CODE

Now click the FOOTER CODE, and paste your code in:
